Showing posts with label diy project. Show all posts

Tuesday, January 31, 2012

DIY: no-sew fringe blanket

I found a super cute new project that I thought y'all might enjoy! 

The no-sew fleece fringed blanket. 

I've been wanting to make this for quite some time for our little furrbaby. Our little munchkin is having a big surgery tomorrow so I wanted to have it done before he got home so he has something extra special and soft to cuddle in. {Okay so it's not a big surgery, he is getting neutered. But I am surprisingly spastic about this whole thing that I couldn't bare to take him. I've requested that hubs take him and pick him up. I will be at home waiting to take care of him)

 My boofriend, Anna got me a gift card to one of my favorite places for my birthday, Hobby Lobby! So the hubs and I went there this weekend to pick out the fabric and the rest of the supplies. 

Here's what you will need (for a furrbaby blanket):
-2 complimentary fleece fabrics, 1 yard each (I chose camo and paw print. I really wanted turquoise but they didn't have it) Also your best bet is to buy these on sale or else you will be spending $25+ on a dog blanket.
-extra sharp scissors and/or a scissor sharpener
-tape measure or ruler
-marker
-a furry little helper ;-)

Lay out both of your fabrics one on top of the other. Cut out 4"x4" squares at each corner.


 Lay the ruler or tape measure across one side and mark every 1". It doesn't have to be perfect but it needs to be consistent. Then cut your fringe on the side you just marked. Repeat these steps on every side.

When you have completed cutting the 1" strips all the way around. Pick a corner to start in and tie in a regular over-hand knot EVERY OTHER section of fringe. {*side note; yes that is a recliner. It's the hubs recliner. If I had it my way it would be a lovely animal print vintage winged back chair. I'm such a great wife ;-)}

Once you are done with every other one. Flip the blanket over and do the same thing with the remaining untied sections of fringe. (I double knotted this side.) 

For a little extra flair ;-) (shocking it's not rhinestones, i know) I added these pre-embroidered iron on patches to officially make it his. 

He wouldn't sit still he kept nestling trying to rumple it all up. So he's making the "Mom quit straightening it out, I'm trying to get comfortable" face. 

All in all it took about 2 hours to do. But I was multi-tasking, Gunnar was wanting to play and The Real Houswives of Beverly Hills Reunion Part 1 and It's a Brad Brad World was on...what. ;-)

These blankets are super soft, adorable and can be fantastic gifts for a babyshower, for girls going to summer camp, teenagers or pretty much anyone who likes cuddly throw blankets.  I'm looking forward to making more of these. 

Have you made one of these, would you make one of these? If so, please share i'd love to see them! 

supersnugglecuddlefesttime,


Monday, January 23, 2012

D IY : reverse tip nails to extend your Shellac mani & nail polish ADD

It really is kind of ridiculous how much I change my nail polish and the amount of colors that I currently own. 
Oh well so what, it's one of this small things that can make a gal feel a wee bit fancy. 

I've been seeing the reverse mani all over Pinterest and never wanted to go into so much detail until recently. The reason  you ask? My girl friend and I went to get Shellac mani's back on 12/26. Well this time around the lady did the mani so good it was still hanging around on 1/9! The only problem, is the major growth of my nails and this huge bare spot by my cuticles... 
Enter: the reverse mani - problem solved! 

All you need are garage sale dot stickers or the binder hole reinforcement tabs
Your favorite contrasting nail polish. 

Stick the stickers on and paint 2-3 coats, depending on your color...

and voila, a pretty reverse tip manicure!


This extended my Shellac mani until the following weekend 1/14! Friends this has got be some kind of record for sure- 3 week, no-chip manicure for $35! You bet!


Here is a look at my past Sally Hansen Salon effects nail polish strips obsessions. So far my favorite is the 'Kitty Kitty'. I also have worn the 'Glitz Blitz' which is just a simple gold glitter. Not worth $8.50 IMO because I can create that look easily with gold glitter nail polish. 

'Kitty Kitty'

'Laced Up'

A little team spirit - 'hook'em horns'!

Pinterest inspired (I can't for the life of me find the link. sorry)

Thursday, December 29, 2011

diy : 52 reasons why I love you!

Here is a super easy and very thoughtful gift you could actually make for anyone special in your life. I chose to make this as a litte Christmas gift for my hubs. I saw it on Pinterest (of course) just in time to get it all together.


You'll need:
a deck of cards (I found mine at Michael's craft store)
bind rings (Wal-Mart has them in the stationary section)
2"x2" sticky labels (for you to write the reasons on) 
I added pictures that corresponded to the reason that I printed out, cut and glued them to the inside of the  opposite card
Office Max will hole punch the deck of cards for just a couple bucks.


a sneak peek at the inside of the deck

 He loved it so much! He wanted to hang it somewhere he could see it daily. What a better spot than on his cowboy hat rack. {Yes, he owns enough cowboy hats to need a rack to keep them on :)}


52 just to name a few, 


Wednesday, December 28, 2011

diy : glitter striped top

I've been wanting a sequin top for quite some time now, but every time I see one I say to myself  "really, when and where are you going to wear that. Let's be practical!"  So I end up passing them up. (I know, me, passing up glitter or sequins of any kind...unheard of!) Well this blog that I love to follow, The Budget Babe had a recent post about how to glitter stripe your own shirt! Brilliant I thought, I'll just make my own on the cheap instead of spending mucho moola to buy a pre-made one. Plus I get more satisfaction out of a diy project. 

I basically followed the steps in her blog, but I did a few things a little different. I found a striped Henley tank at Old Navy for $7 (similar here)! I thought the gold glitter would look pretty over the tan stripe. 
So I taped off the stripes as directed in the Budget Babe blog. 

 My craft store, Hobby Lobby did not have the color of gold I would have preferred to use. They were either very orange gold or very green gold. So I decided to mix a really pretty rose gold and the more green gold together. Just squeeze out a blob of this glitter bond onto a paper plate, dump as little or as much glitter and mix it up with the a stirring utensil (I used the end of a paint brush) and use the applicator sponge that the glue comes with to spread it on. 

Here is an up close of the shirt after I peeled the masking tape off. 
 This is before the glitter glue was applied. 

And here is what the tank looks like on (it's a little blurry, but you get the idea)! 


So super easy! I bought another t-shirt from Old Navy  for $5 I am going to try the Chevron pattern just towards the bottom. 

fairy poop and all things sparkly, 


Friday, December 23, 2011

diy : chalkboard paint dipped wine glass

I have been a busy little crafting bee lately; I'll post more DIY projects later (can't post until after Christmas). ;-) 
I saw this cute little inspiration on Pinterest (of course) and decided I would add my own flare to it for sweet and simple Christmas present. 
                                                                          Source: justshortofcrazy.com via Sallie on Pinterest


I had T pick up some chalkboard paint from Home Depot! 

I didn't tape off the glass or anything, I thought it would look cooler if it wasn't so perfect. 

 Open the lid, stir the paint and I just dipped the base of the glass right into the paint can. I didn't want to hold it the entire time so I propped it up in the paint can box and rotated the glass about every 15 minutes so that the pain will dry evenly. 

Then I found on Google the image of what I wanted to bling onto the glass; because every girl needs bling in their life. I drew it on with a marker first. I used the same glue and more of the rhinestones from this post. 


And voila! Le super cute wine glass for the cutest Michigan Wolverine I know! 


Sadly I didn't have any chalk laying around so I couldn't write on the base of it. But what you could do to add a little extra is get a couple pieces of chalk and tie a ribbon around them and put them in the glass- makes for a little extra pizzaz. 

I'd love to see if you guys make one or several of these. Please link a picture in the comments! 

like a rhinestone cowgirl,


Monday, December 5, 2011

it must have been in the water...

Lately it seems like most of my girl friends were just poof, all the sudden preggers! It must have been the hot Texas weather we had keeping everyone inside playing under the sheets. *wink wink* Or maybe it was in the water. What ever it was I am SO very excited for all of them and excited that I didn't drink the same water! All in due time Momma. I promise I will make you a Kiki one day. 
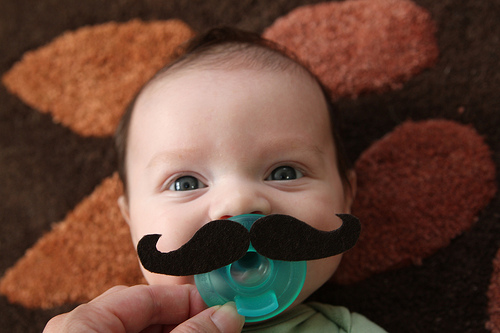
I attended the first of many showers to come this past weekend. One of the cute little gifts I made were these little mustache binky's or pacy's or golly gaw's or whatever your family calls them. 

All you need are pacifiers in whatever color you like, a mustache template (I found this great one with a couple different options), a sheet of black foam and super glue. And voila!


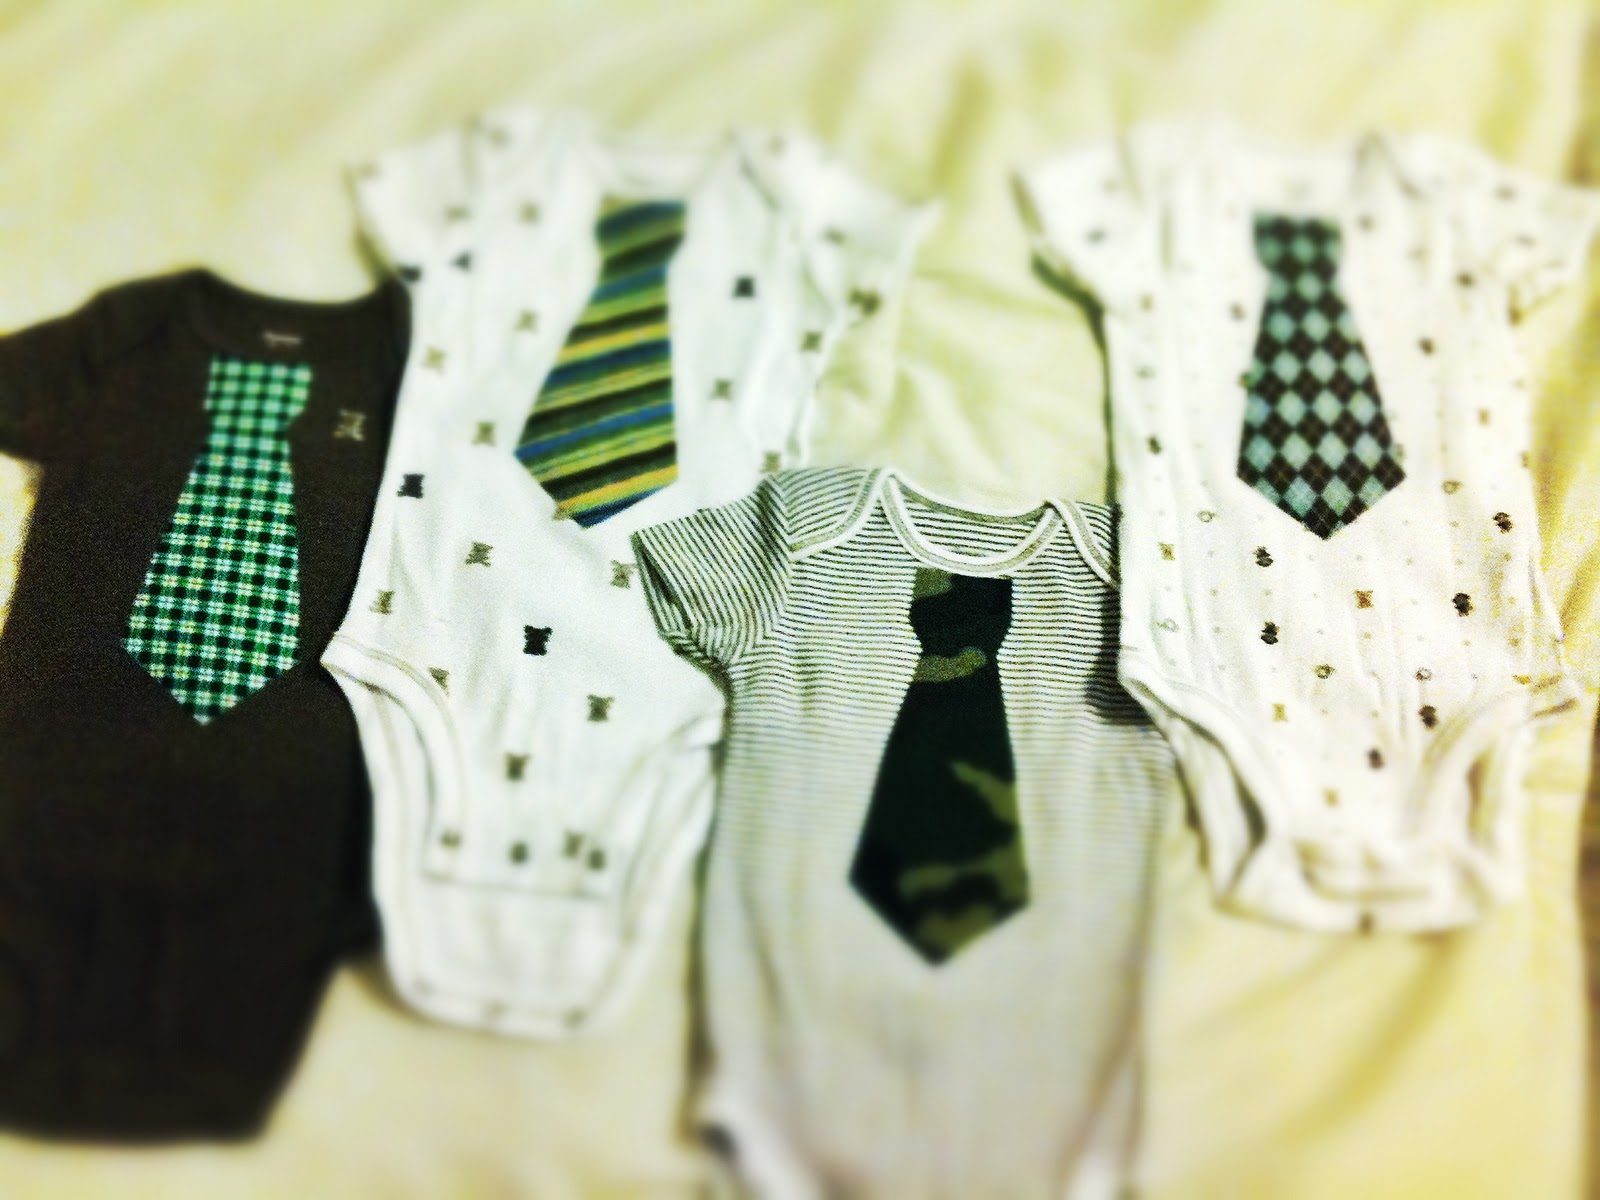
Then to add to the 'little man' theme I made these little onesies to go along with the pacy's. I bought a set of four onesies from Target ordered these iron-on tie cut outs from Etsy.com


I can't wait to see what the precious little baby boys look like with a tie and a mustache! I'm guessing a combination of the following. 


squeee at cute wittle babies, 
LeFoof


Tuesday, November 29, 2011

d i y : my blingtastic heels

A couple of weeks ago my friend and I decided to make a trip to the local craft store where I came across a ONE POUND tub of rhinestones! One pound you say, what ever will you do with a pound of rhinestones?! I plan to put bling on anything and everything I can, that's what I will do with them! 
This is where one of my other DIY projects comes in - rhinestone covered, cobalt blue platform pumps! 

You will need one pair of simple platform heels. I found mine at Target for $30! 


E-6000 indsutrial strength glue and at least 150 rhinestones of various sizes.


These little chopstick looking things called 'rhinestone placement tool' makes it so much easier to pick up and place the rhinestones into the glue. 


Start in the corner and work your way across the top line of the platform and fill in. 


I covered the heel of mine also but didn't take a close up photo. You can sort of see it in this one below.


LeFoof

Thursday, November 10, 2011

my latest DIY project: a personalized lyrics, hand-scripted scarf

I was surfing the blogosphere the other day and came across this lovely blog Stamp48 that had a precious DIY project that I instantly fell in love with! I couldn't wait any longer, I had to make this scarf. 
So yesterday I popped into Joann's to pick up the ink (30% off, score!) and then swung over to Sam Moon where I picked up a white scarf!

Instead of a poem or a quote I chose to do a song that means the world to me. It is the chorus of my hubby and I's First Dance song - 'Who I Am' by Wade Bowen. There is just something about having these lyrics wrapped around me keeping me warm and cozy on this crisp fall day. 

'And I love to watch you laugh and smile, I love to watch you dream 

Love it when you take my hand let me know you believe in me And I love it that you're my girl, I love that I'm your man Now that you're in my life Baby I know exactly who I am'

The ink


 Lyrics completed, letting the ink dry

Voila, le precious personalized script scarf!

What lyrics, poem or quote would you write on your scarf? Please share with me if you end up making one of these for yourself or as a present. Look out friends and fam, I totally intend on making these for holiday or birthday presents! 

oh she crafty huh, 
LeFoof